Fermenting fruits and vegetables has become a popular trend among health enthusiasts seeking to enhance their gut health naturally. This age-old preservation method not only extends the shelf life of produce but also enriches them with probiotics, essential vitamins, and improved digestibility. Below, we delve into the fascinating world of fermentation, breaking down each step to ensure you can safely and successfully create your own gut-friendly fermented goods at home.
Understanding Fermentation
Fermentation is a metabolic process that converts sugar to acids or gases. It occurs in yeast and bacteria, but can also take place in oxygen-starved muscle cells, as in the case of lactic acid fermentation. In the context of food preservation, it allows naturally occurring beneficial bacteria to thrive, creating an acidic environment that preserves the food and imparts it with distinct flavors and health benefits.
Benefits of Fermented Foods for Gut Health
The consumption of fermented foods offers multiple benefits for gut health, as these foods are rich in probiotics, essential vitamins and nutrients. These benefits include:
- Improved Digestion: The presence of beneficial bacteria in fermented foods can aid in the breakdown and absorption of nutrients, promoting a healthier digestive system.
- Boosted Immunity: The probiotics found in fermented foods can help balance the gut microbiome, strengthening the immune system and reducing the risk of infections.
- Reduced Inflammation: Fermented foods contain high levels of antioxidants and anti-inflammatory compounds, which can help reduce inflammation in the gut and other parts of the body.
- Enhanced Nutrient Absorption: The fermentation process breaks down complex nutrients into simpler forms that are easier for the body to absorb, increasing nutrient availability and absorption.
Selection of Produce for Fermentation
Not all fruits and vegetables ferment equally; some are better suited for the fermentation process than others. High-quality, fresh, organic produce typically yields the best results. Cruciferous vegetables like cabbage and root vegetables like carrots are popular choices that ferment well. Fruits can be more challenging due to their higher sugar content but can still be fermented for unique flavors and health benefits.
Essential Tools and Ingredients
Before beginning the fermentation process, you'll need certain tools and ingredients. A clean work environment, sterilized glass jars, a weight to keep the produce submerged, and a seal to allow gases to escape are all necessary. As for ingredients, aside from your chosen produce, you will need water and salt, which acts as a brine to encourage the growth of good bacteria and suppress harmful bacteria.
Step-by-Step Fermentation Process
Step 1: Prepare Your Produce
Wash your chosen fruits or vegetables thoroughly under cold water to remove any soil or pesticides. For tougher-skinned produce like beets or carrots, scrub with a brush. Next, chop or slice the produce roughly to the desired size, keeping in mind that smaller pieces will ferment more quickly.
Step 2: Create Your Brine
Dissolve sea salt into filtered water to create a brine solution. The typical ratio is 2-3 tablespoons of sea salt per quart of water, but this can vary depending on the recipe. Ensure the salt is completely dissolved before use.
Step 3: Pack the Jars
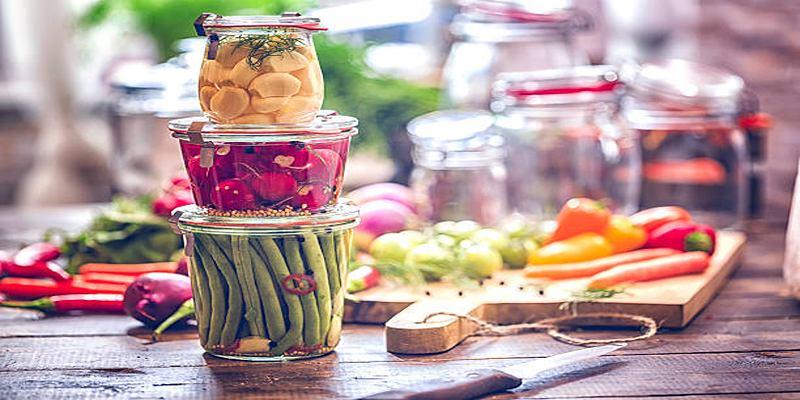
Place your prepared produce into clean, sterilized jars. Pack them tightly to minimize air pockets, which can hinder the fermentation process. Leave about an inch of space at the top of the jar for expansion.
Step 4: Pour in the Brine
Carefully pour the brine over the produce, ensuring that it is completely submerged. The brine acts as an anaerobic environment where harmful bacteria cannot survive, and good bacteria can thrive.
Step 5: Weigh Down the Produce
Use a fermentation weight or a clean, smaller jar filled with water to weigh down the produce, ensuring that it remains below the level of the brine and is not exposed to air.
Step 6: Seal the Jar
Close the jar with a fermentation lid, which allows gases produced during the process to escape without letting air in. If you don't have a fermentation lid, you can use a standard lid but remember to 'burp' the jar daily to release built-up gases.
Step 7: Store and Monitor
Store your jar in a cool, dark place. Kitchen cupboards or a pantry are ideal locations. Fermentation times vary depending on the ambient temperature and the produce used. Monitor the fermentation, checking for bubbles and a slightly sour smell, which are signs of successful fermentation.
Step 8: Taste and Store Refrigerated
After a few days to a few weeks, depending on your taste and the recipe, begin tasting the ferment. Once it reaches the desired flavor and acidity, transfer the jar to the refrigerator. This slows down the fermentation process and your fermented produce is ready to enjoy.
Storage and Shelf Life of Fermented Foods
After fermentation has completed, proper storage is critical to maintain the quality and safety of the fermented products. Refrigeration is the most common method to halt the fermentation process and preserve the food's flavor and nutritional value. Generally, refrigerated fermented foods can last for several months.
Troubleshooting Common Fermentation Issues
Fermentation is as much art as science, and sometimes issues can arise. Common problems include mold growth, off-flavors, and incorrect acidity levels. Learning how to identify and fix these issues is crucial to ensure safety and success in your fermentation endeavors.
Safety Considerations in Home Fermentation
While home fermentation is generally safe, taking proper precautions is essential. Ensuring cleanliness throughout the process, using the correct salt concentrations, and watching for signs of spoilage can all help prevent potential hazards and ensure your fermented foods are both delicious and safe to consume.
Conclusion
Fermentation is an ancient practice that has been revived in modern kitchens due to its numerous health benefits and distinct flavors. It's a method that allows us to not only preserve food but also to enrich our diet with probiotics, vitamins, and nutrients. Whether you're a beginner or a seasoned fermenter, the joy of watching simple ingredients transform into complex, flavorful foods is a rewarding process. With patience and care, you can turn the ordinary into the extraordinary, and bring a piece of cultural tradition into your daily meals. Embrace the bubbling jars on your counters as signs of a healthy, active microbial life that will ultimately contribute to your own vitality.


